Stripe It Up Neckwarmer

The Stripe it Up Neckwarmer was my sampling project to see how the colours of our new Indigo Stripe yarn would knit up. I’ve played around with self-striping yarns since I first started dyeing wool, way back in October 2011 apparently. That was the date on an old photo I found.
The beauty of a self-stripe is that the yarn does the colour work for you. You can knit in cruise mode and still end up with a gorgeous result.
So if you’re using our Cowgirlblues Merino Twist Stripe Yarn then this almost isn’t a knitting pattern. It’s that easy!
But I know how much some people like to follow the instructions.
So here is my very simple and straightforward pattern for the Stripe It Up Neckwarmer.
This project is a REALLY easy knit.
It only takes one skein of Merino Twist Stripe yarn.
You can easily make it bigger or smaller by changing the number of stitches you cast on.
And it’s versatile.
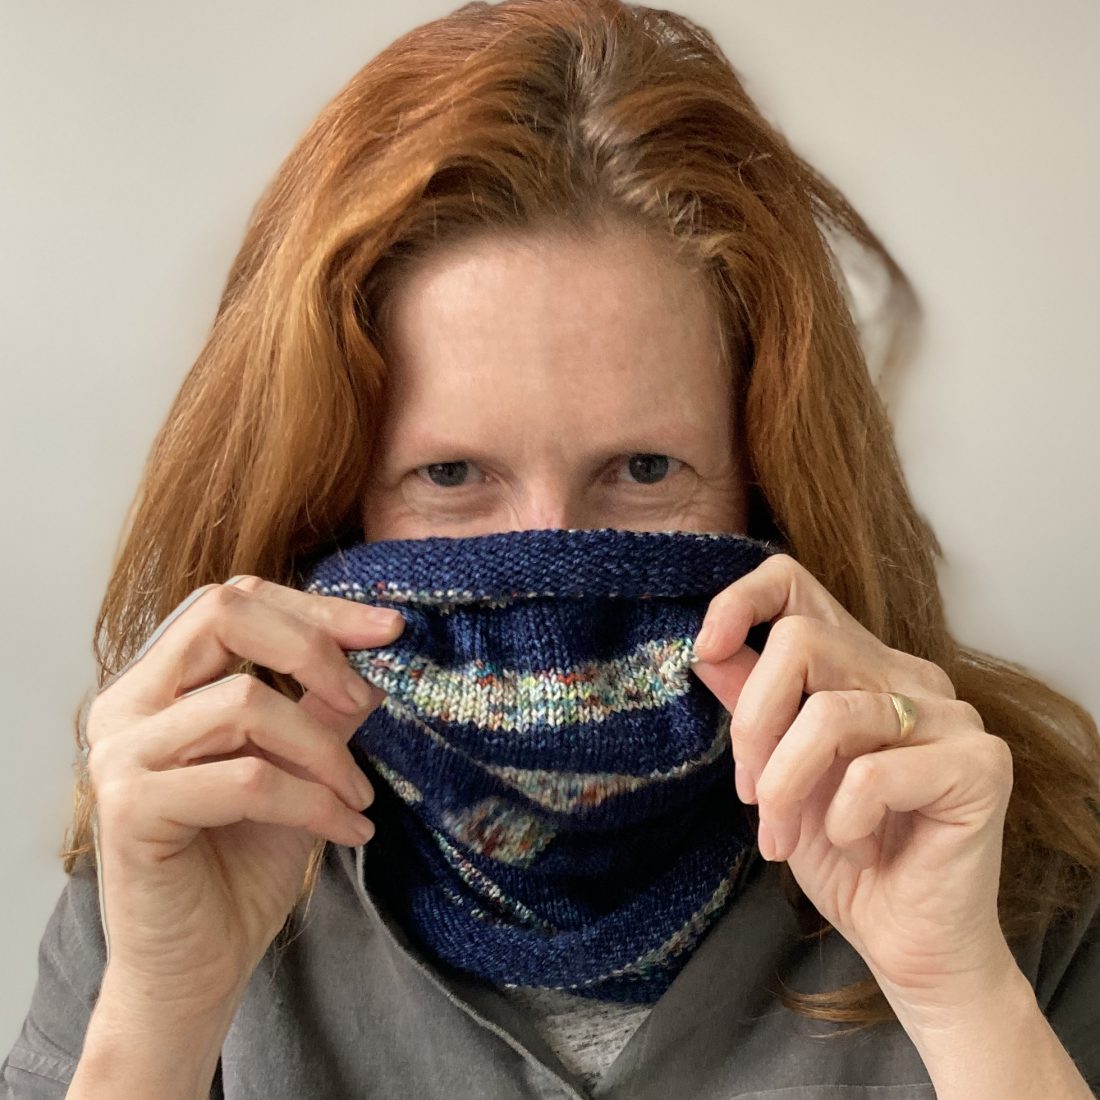
Wear it “beanie style” to keep your head warm.
It’s even reversible.

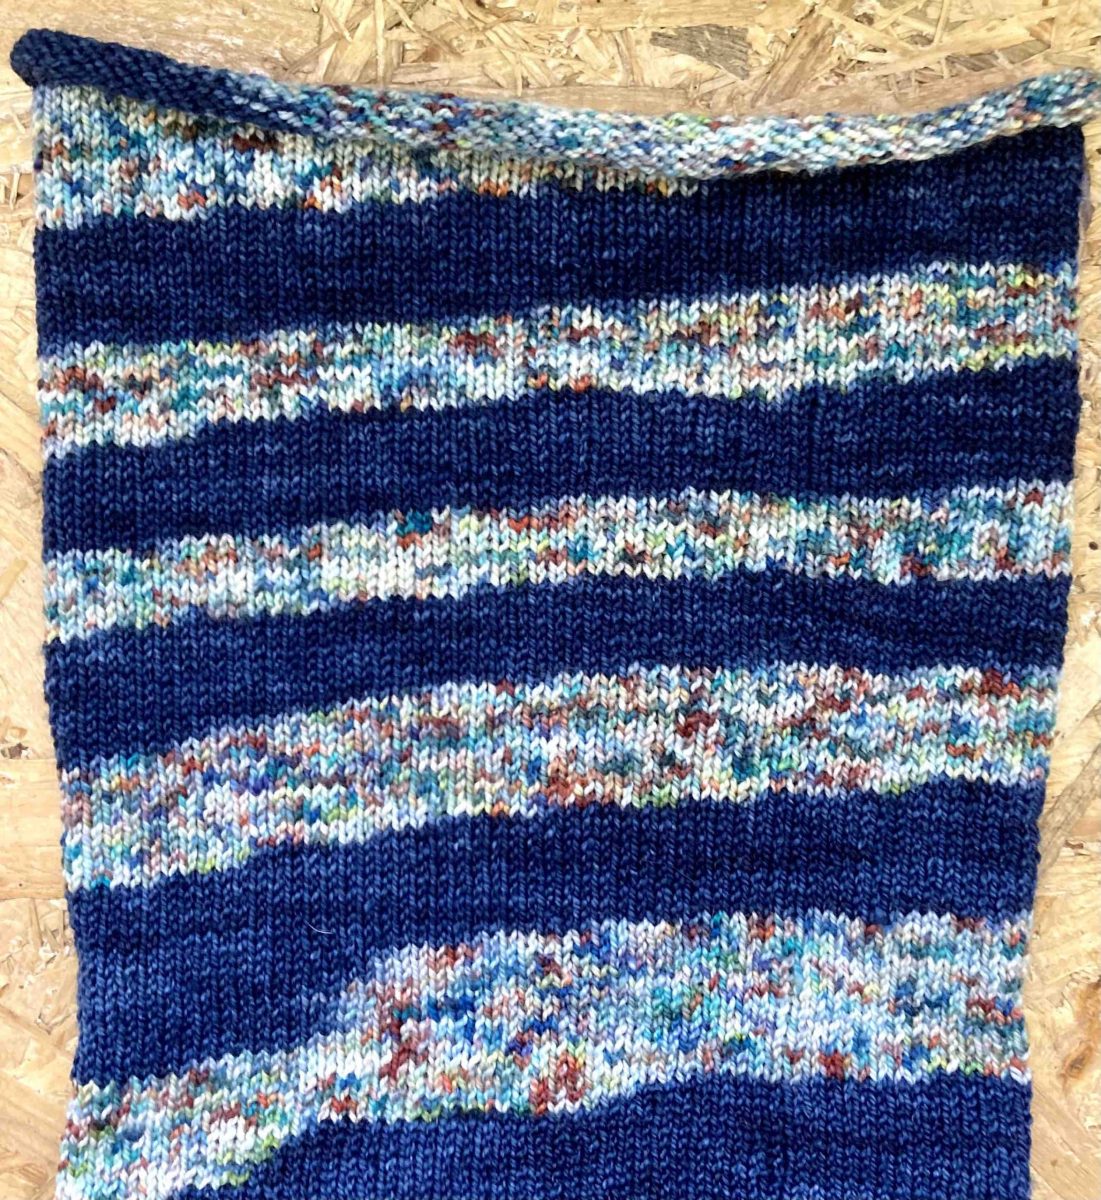
In the spirit of full disclosure the striping is a little bit of an illusion. Most dyers have a limited skein circumference they can work with. Yarn bases are often purchased already skeined by the suppliers and there isn’t much flexibility on the size. We wind our own skeins, but we have limits too. So these Stripes were dyed on our standard size Merino Twist skeins. They create a fine stripe (one row per colour) on a small diameter project like the Purl Soho Stockinette Stitch Hand Warmers. In this neckwarmer project they only give the illusion of stripes. But that’s good enough for me.
Look at the Stripe it Up Neckwarmer laid out flat and you’ll see the stripes run at an angle. And if you look at the curling cast-on edge you can see it is actually worked in the two different colours.But don’t let this stop you. Who is looking that closely and styling their outfits with a spirit level anyway!

MATERIALS
- 1 x 100g skein Cowgirlblues Merino Twist Stripe Yarn. I used the Indigo Stripe. This will also work beautifully with any multi-colour or semi-solid yarn also.
- 3mm circular knitting needle
- Darning/Tapestry needle to finish your ends
SIZE
~23cm across and ~48cm long when I uncurled the edges
It stretches comfortably to fit over my head which is ~60cm around at the forehead, and can be worn long and slouchy or folded in half
You can very easily adjust the size by changing the number of stitches you cast on
GAUGE
~24st and 40 rows = 10x10cm in stocking stitch
KNITTING INSTRUCTIONS
Cast on 110 stitches using your preferred cast on method. Make sure it’s a relatively stretchy one or you won’t be able to get it over your head. My standard cast-on is the thumb method so that’s what I used.
Join your stitches to form a circle, taking care to keep the stitches straight and not twisted.
You don’t need to place a marker, but if you feel more comfortable then do so.
Then start knitting. There is no pattern, it’s all knit in the round which will give you stocking stitch fabric.
If you want to have some fun with it then purl all the solid colour stitches and knit the multi-colour. That will create some texture in your stripes. I was happy to let the yarn do all the work.
FINISH
I like to minimise wastage and leftovers and use all the yarn on the project. To do this, when you’re getting close to the end of your yarn fold what’s left in half and make a little loop knot. Use a stitchmarker so you know where the end of the round is, and if you haven’t reached the knot in the next round you’ve got enough yarn for one more. If you’ve reached the knot then backtrack a bit because you haven’t go enough yarn left for the cast off. Mine was a very close finish.
Work your cast-off again making sure not to pull it too tight. Pull your yarn through the final stitch and finish away your ends.
Handwash gently and dry flat, shaping as required.
Happy knitting!
PS Please leave a comment and let us know if you made this project, and remember to post some pictures and tag us on Ravelry, Instagram and Facebook


