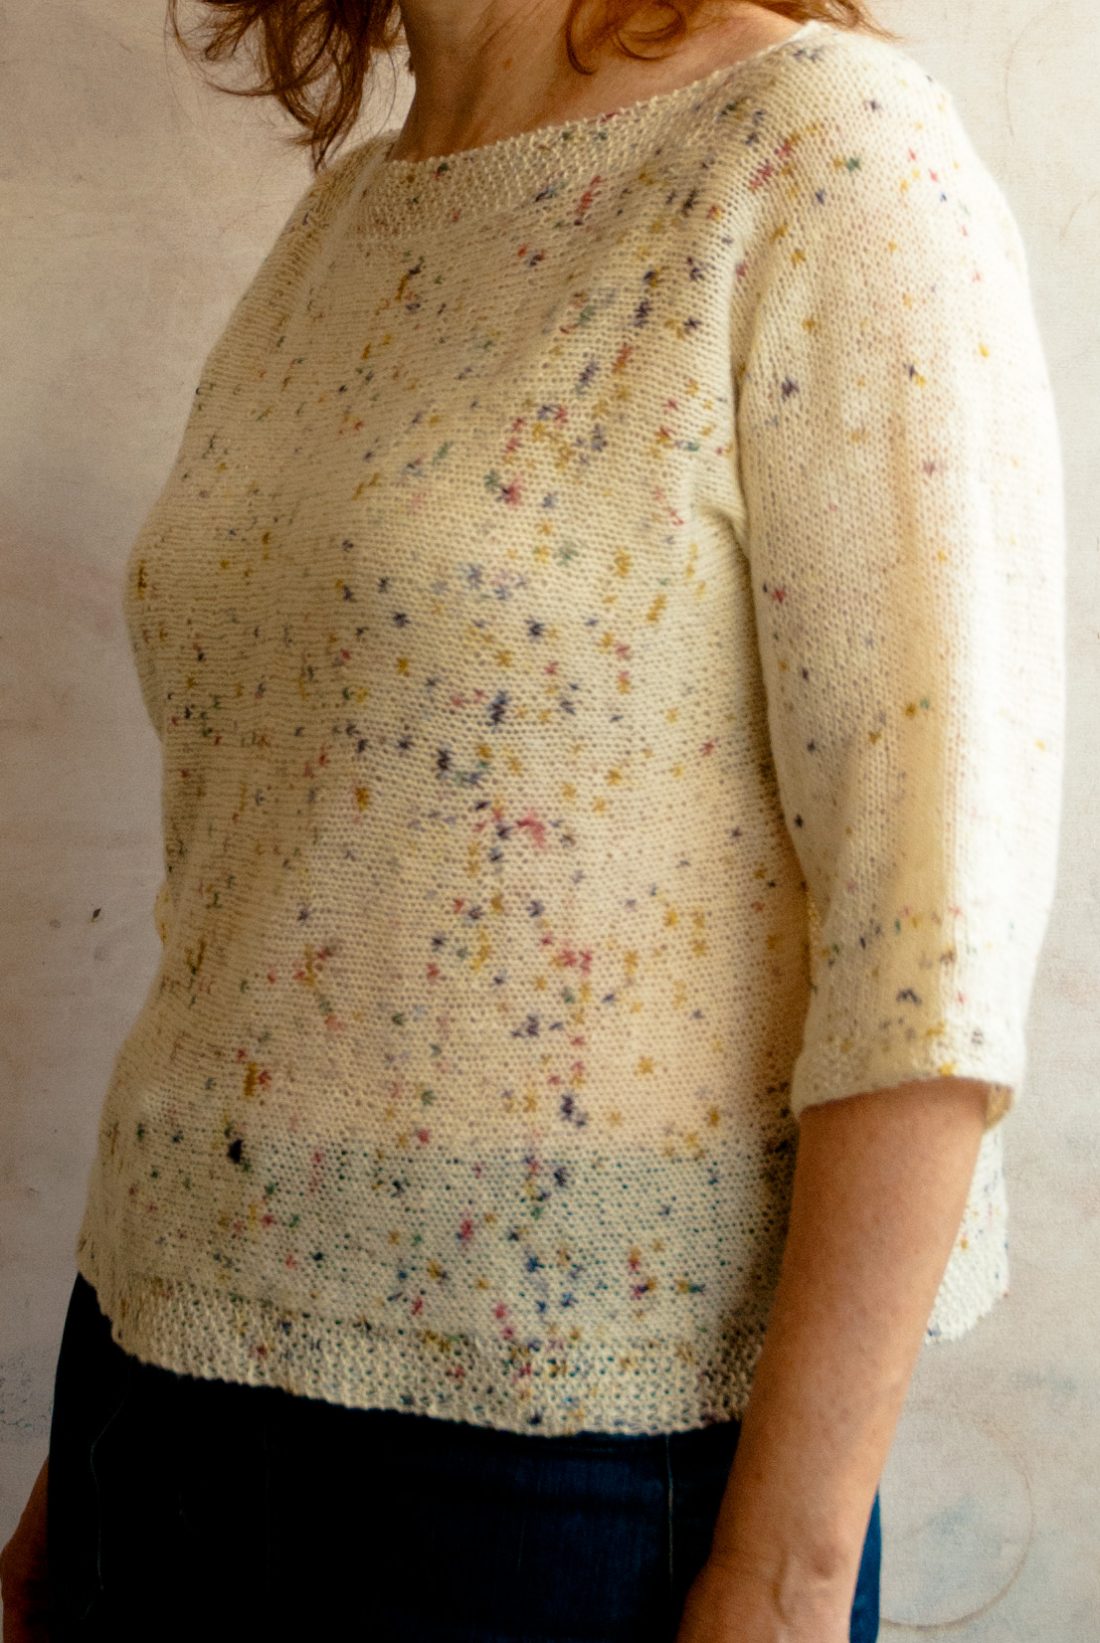
Geneva Sweater
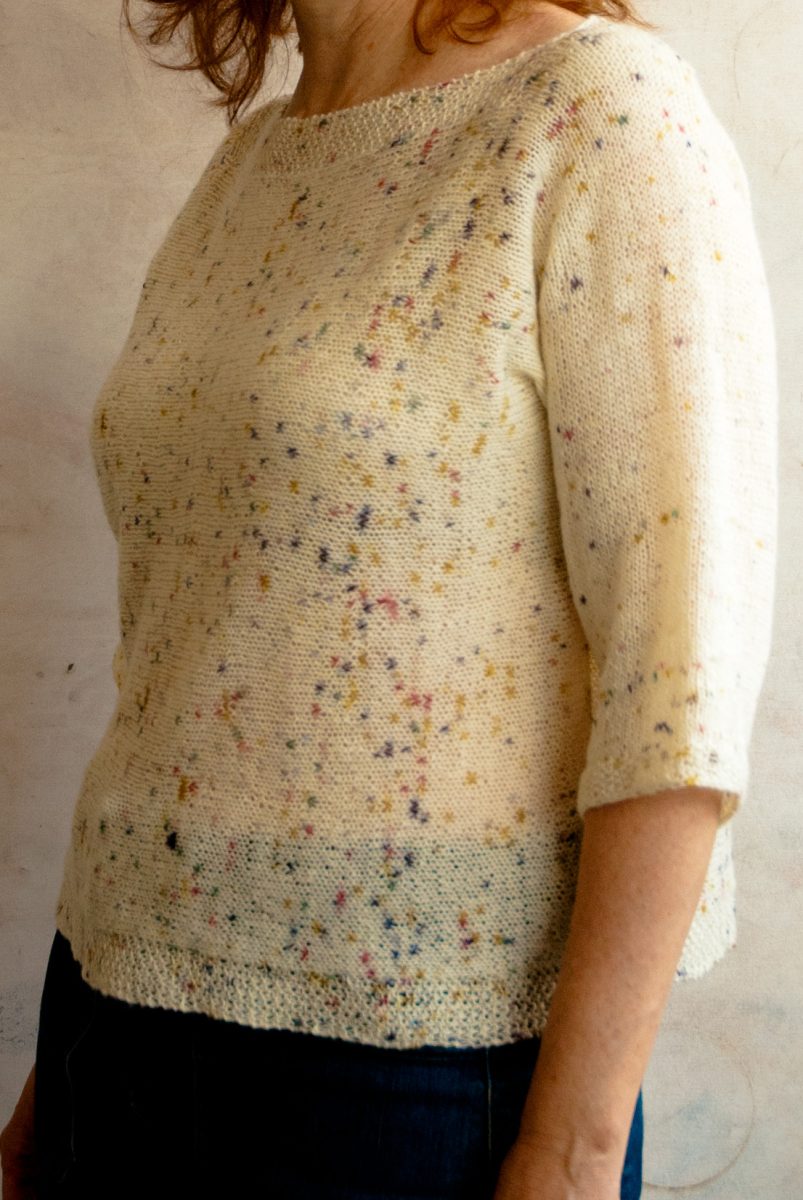
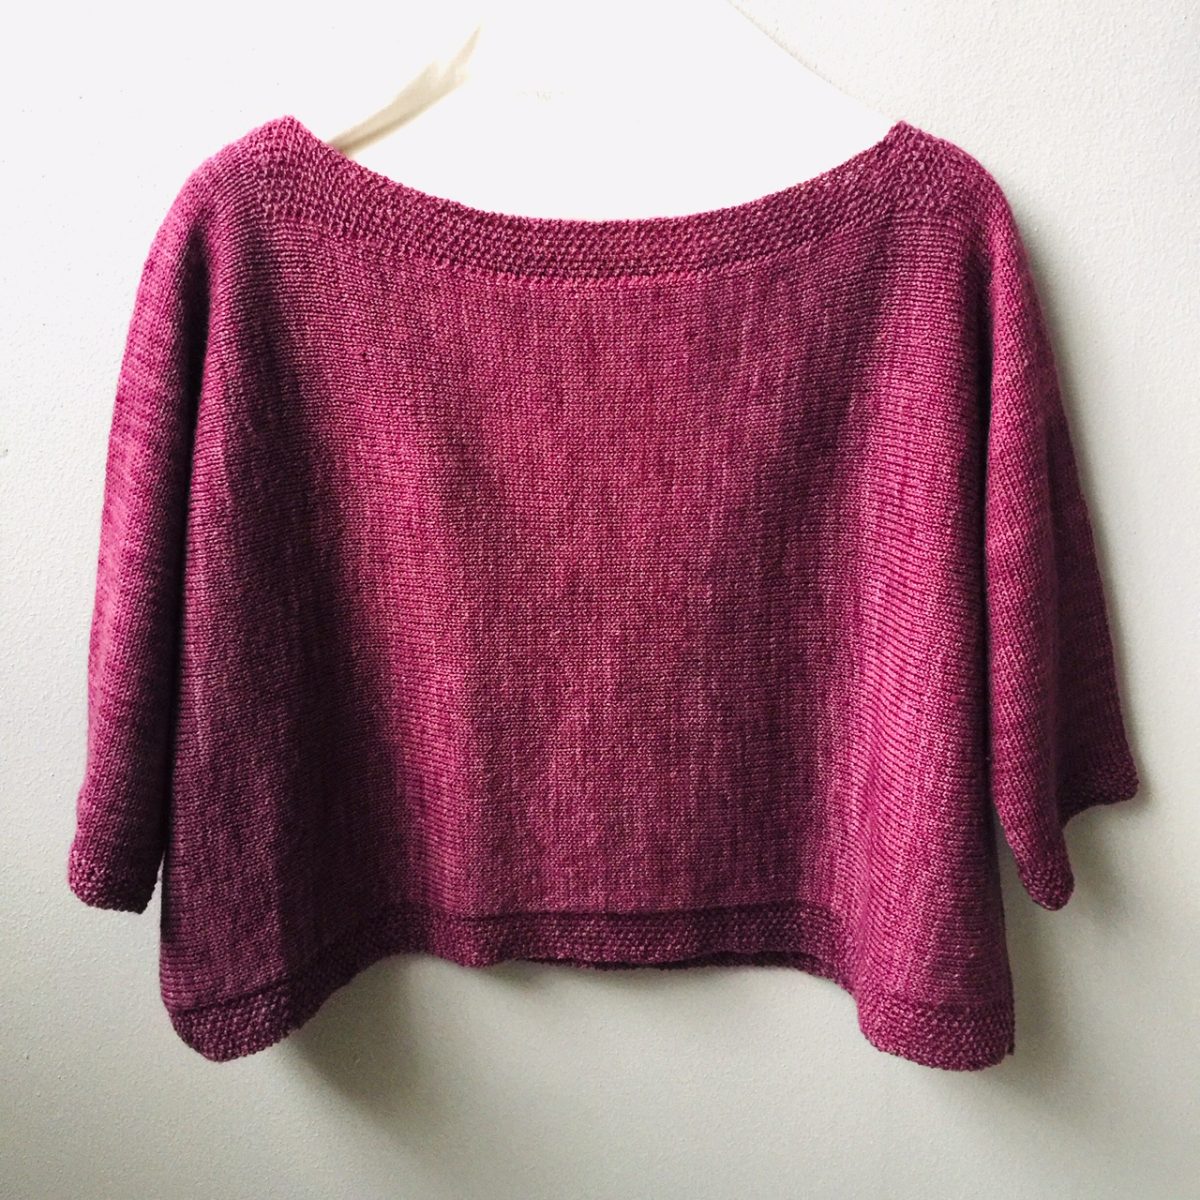
I’ve been trying my hand at creating knitting patterns this year. My progress is slow. But I’m learning. And the result is extremely gratifying. Although the tricky part is that as a beginner I don’t get things right first time, so I usually have to make one or two samples and that can be rather time consuming. I don’t have huge amounts of jersey knitting experience so this Geneva Sweater was my “beginner” approach. There is no shaping but it still fits well. Since I’ve only created it in one size, with a “cheat sheet” for customising the fit. It gets its name from the city in Switzerland. I passed through it on a train earlier this year when I was knitting this second version. I love to travel and the name reminds me of my journey. You’ll find a downloadable pdf at the bottom of this post and you can find all sorts of yarns to knit with in our online shop.
This is an uncomplicated side-to-side knit sweater pattern which is easy to knit, and great for beginners or more experienced knitters. Knit in Cowgirlblues Merino Lace Single it is beautifully light with a soft drape. And it also works well with Cowgirlblues Merino Twist for a heavier garment. The side-to-side construction means no shaping challenges. And it’s easy to adjust the pattern to your fit preference. It is a good project for a knitter with basic skills who wants to grow into knitting jerseys, or a relaxed one for a more experienced knitter.
MATERIALS
2 x 100g skeins Cowgirlblues Merino Lace Single Tambourine Man
To knit using a solid colour 3 x 50g balls is enough for the size as written
For a heavier weight sweater try 7 x 50g Cowgirlblues Merino Twist in Plum (pictured)
3.5mm circular needles, at least 80cm cable or longer
4 stitch markers
Row Counter
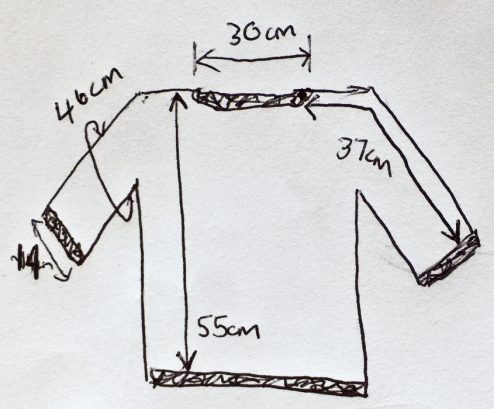
SIZE
Front length: ~55cm
Neck width: ~30cm (in the Merino Twist version I found the neck came out a bit wide)
Neck to cuff: ~37cm
Chest circumference: ~104cm
GAUGE
24 stitches and 33 rows measured on 10x10cm sample in stocking stitch
STITCH GLOSSARY
K: knit
P: purl
St: stitch
Sl: slip the stitch to the next needle without knitting
K2tog: knit the next two stitches together
Tbl: through back of loop
Kfb: knit into the front and back of the stitch
Stocking stitch: Knit one row, purl one row
KNITTING INSTRUCTIONS
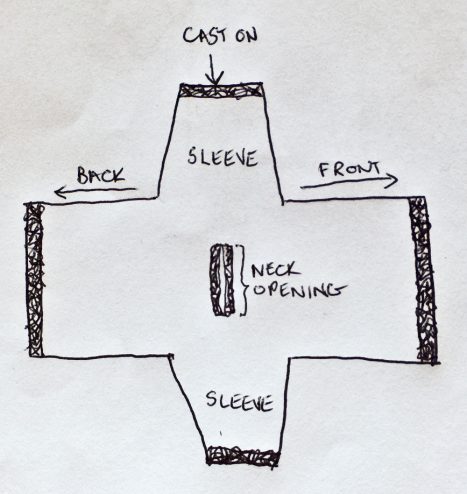
The jersey is worked side-to-side from one sleeve edge to the other as a flat piece, leaving a gap between front and back which becomes the neck opening.
Getting started
Cast on 71 stitches and leave a long yarn tail that you will use to close the side seam of your garment.
Work 8 rows of moss stitch: (K1,P1), repeat to end
R9: On this and every following 4th row: Kfb, Knit to last stitch, Kfb. All other rows are worked in stocking stitch
Continue the increases every 4th row until you have 103 stitches.
From this point start counting rows with your row counter while working straight in stocking stitch until your work measures ~23cm.
Note your number of rows [Sleeve count] and reset the counter to zero.
Working the shoulder
To create the front and back length cast on 60st at the beginning of the next two rows then work the full length of all the stitches, creating a moss stitch border at each edge for the hem.
Row 1: Insert your right needle into the gap between the first and second stitches and wrap the yarn as if to knit a stitch. Pull the stitch through and place it back onto the left needle. You’ve cast on 1 stitch.
Continue casting on 60 stitches in total, being careful to keep them loose and even, these will be your front side seam. Now work the row as follows:
Sl 1, (K1, P1) four times, place marker, knit to end, turn.
Use your row counter from this first row.
Cast on 60 stitches at the beginning of the next row (purl side) as you did before, then work as follows:
Sl1, (K1, P1) x4, place marker, purl to next marker, slip marker, (P1, K1) x4, K1tbl
Continue as follows until work measures 37cm from sleeve edge:
Knit rows: Sl 1, (K1, P1) x4, slip marker, knit to marker, slip marker, (P1, K1) x4, K1tbl
Purl rows: Sl 1, (K1, P1) x4, slip marker, purl to marker, slip marker, (P1, K1) x4, K1tbl
Note down the number of rows worked and reset your counter to zero. [Shoulder count]
Front
Divide your 223st in two (111 for the front and 112 for the back) then count 9 stitches each side of the centre and place your stitch markers.
Work the first 111 stitches for the front in the same way as the shoulder section, only over a shorter row.
Leave the back stitches on your needle, or transfer them to a separate cable or thread if you prefer.
Work as follows until the front measures ~30cm:
Knit rows: Sl 1, (K1, P1) x4, slip marker, knit to marker, slip marker, (P1, K1) x4, K1tbl
Purl rows: Sl 1, (K1, P1) x4, slip marker, purl to marker, slip marker, (P1, K1) x4, K1tbl
Break the yarn, note down the number of rows worked [Front count] and reset your counter to zero.
Back
Now go to the remaining stitches to work the back.
Join your yarn starting on a purl row and work as per the front until you’ve worked the same number of rows as the Front count.
[I find it much easier to get them matching by row count rather than measuring with a tape measure]. Remember to reset your row counter.
Neck Closing
To join the two pieces back together when you reach the neck edge simply carry on knitting onto the front stitches, keeping the yarn tight at the join, and work the full row of 223 stitches again. You can drop the stitch markers from the neck now that you have closed the neck gap. But keep the markers for the front and back hem.
Continue working the knit and purl rows for the Body as you did before. Keep working until your row count reaches two rows short of the Shoulder Count, you should be ending with a purl row.
If not work one more row so that you’re ready to start a knit row.
Second Sleeve
The remainder of the jersey is simply worked in reverse.
On the knit row, loosely cast off 60 stitches then work the balance of the row.
On the returning purl row do the same. Reset your row counter.
Work straight in stocking stitch until your row counter reaches the Sleeve Count, then begin the arm decreases, starting on a knit row.
On this first and every following 4th row: K2tog, Knit to last two stitches, K2tog
All other rows are worked in stocking stitch
Continue these decreases until you have 71 stitches.
To finish the sleeve work the last 8 rows of moss stitch: (K1,P1), repeat to end on every row
Loosely cast off your 71 stitches and leave a long yarn tail for closing the side seam.
FINISH
To finish your garment fold it in half placing the front and back hems together, and align the underarm edges. You’ll create the shoulders on the fold lines.
For joining the side seams I like to use mattress stitch. It creates a very neat finish on the right side and a light seam inside. But any joining method that you’re comfortable with is fine.
Once you’ve sewn the side seams weave away your remaining ends, hand wash gently and dry flat, shaping as required.
Happy knitting!
PS. Head to our online shop and find some yarn to get started, or find a stockist near you.
Download the easily printable pattern pdf here:
Geneva Side-to-Side Sweater for printing
Download the pdf instructions to customise your sweater size here:


