Creating colourful Granny Blankets
The studio has been insanely busy for the last few weeks (months actually!). Last week we shipped 40kg of wool to Japan, and we have 100kg getting ready to go to Germany. Growth is a wonderful thing but it’s not without its challenges. As a result blog postings have fallen by the wayside – I lie in bed at night thinking of the stories I want to write, but for the moment most of them are still in my head, trying desperately to escape.
Here is one that’s getting out … apparently Monday was #grannysquareday2016 so my timing isn’t too far off. Granny squares are one of my favourite things to make. The way I work them it’s a crochet meditation – simple, repetitive, calming. And with the pace at the studio, and of life in general these days, they provide a much needed break. There are infinitely many ways to make granny squares in terms of mixing colours, varying the patterns (although to me these are technically NOT granny squares, but who really cares), changing sizes and shape, etc. I keep it simple.

People often tell me they can’t put colours together. Mostly they don’t believe me when I tell them that a few years ago I felt the same way, but it’s true. And if you’d like to learn then here’s my formula and process which you might find helpful.
I generally start from one of two places:
1: using leftovers
If this is your plan I recommend one simple starting principal – decide on the size of your squares and keep them all the same. That way it’s easy to piece them together when you have enough, whether you’re making a doll’s blanket, a cot blanket or something bigger.
Colours then depend on what you have available, and once you’ve knitted enough squares you can start figuring out how to put the colours together. This is not the focus of today’s post.
2: a “planned” project
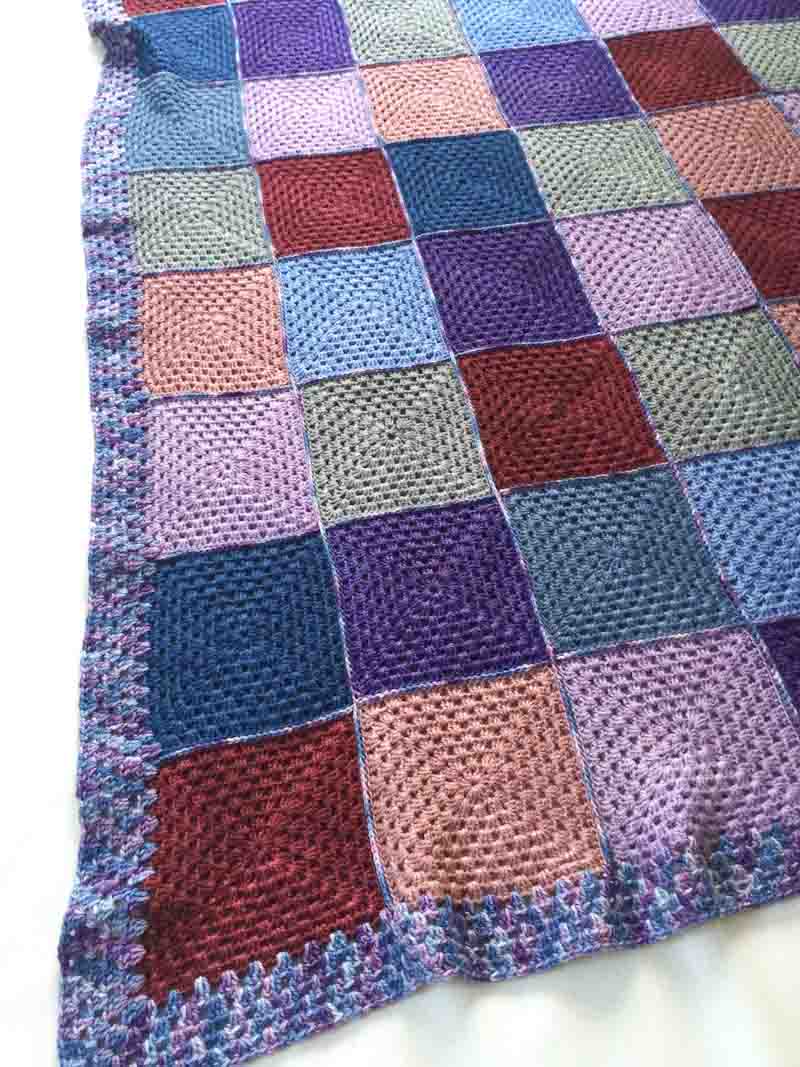
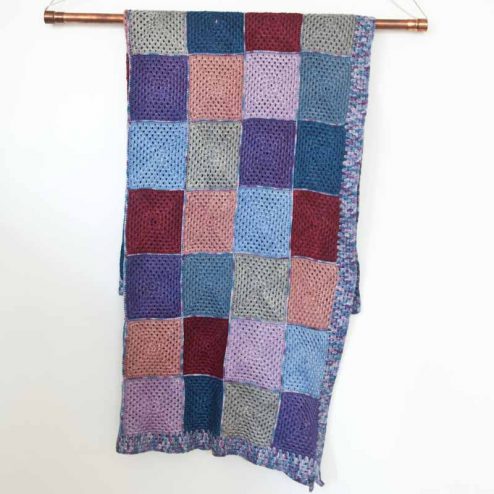
We recently made a custom order granny square blanket for a 75th birthday present. It was to be a couch blankie, perfect for tv watching, so not an insanely large size. But many people find it intimidating to start, so here’s a tutorial on how to approach a planned project like this.
Step 1: Decide the size
Our customer wanted ~1×1.3m and decided on 12x12cm squares
We worked on a configuration of 8×11 squares
Step 2: Choose a colour palette
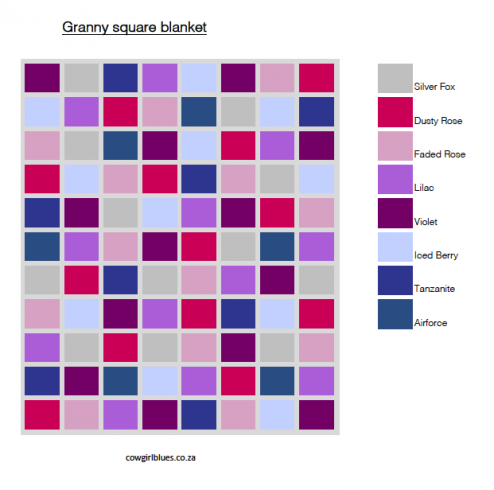
We were asked to work with pinks, blues and purples which we selected from our colour palette as follows: Dusty Rose, Faded Rose, Lilac, Violet, Iced Berry, Tanzanite, Airforce
Step 3: Pick a pattern
This was to be an unstructured pattern mixing the various colours together “randomly”
Step 4: Make a map
Planning your squares is helpful and I find a little planning up front allows me to relax into the crochet without any worries because I know how many squares I need in each colour.
In my former life as a strategy consultant I used Excel a lot. It’s a handy tool, so I use it for blanket planning too, you will need basic Excel skills to manipulate the template.
– Start by adjusting rows and columns to get the blocks you need, the attached is for my 8×11 blanket
– Select your colours and mark those down the side using the “fill” option
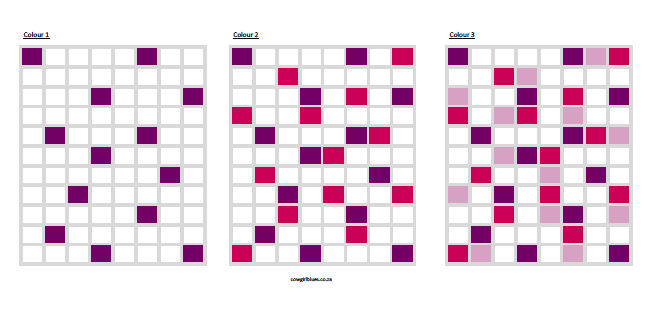
– I begin with a blank page and start with the strongest colour first, randomly selecting squares
– From there work your way through the other colours in turn, trying to mix things up, don’t always put Lilac next to Dusty Rose
– It gets a bit harder as you near the end, and you’ll probably have to make some changes to some of the original colours, but eventually you’ll fill up the box
Step 5: Plan your yarn
Your blanket map needs to be converted to yarn in order to be ready to crochet
– Count up the number of squares per colour
– Work out how many squares you’ll get out of a ball of your chosen yarn … we work on 15g per square of 12x12cm in Merino Sock using a 3mm crochet hook
– Divide (squares per colour)/(squares per ball) and you’ll know how much yarn you’ll need in each colour
(For our blanket we used an additional 2x100g of variegated yarn for the joining and edging, you could easily do this with 1x100g)
Now you’re ready to crochet.
The granny square pattern itself is very simple. You’ll find it all over the internet, here’s my version.
To start:
Make 5 chains and join to form a loop
From here you work in clusters of 3 treble crochet (American terminology, one yarn over before you draw up the first loop)
Round 1:
[ Chain 3(first treble), 2 trebles, chain 2], repeat 3 times then join with a slip stitch
Your chain 2 forms the corners and the tops of the 3 trebles form the sides of the square
Round 2:
2 slip stitches across the tops of the trebles in Round 1 so that you are positioned to start working into the first Chain 2 corner space
[Chain 3, 2 trebles, chain 2, 3 trebles] into the Chain 2 space to form your first corner.
Repeat the corner as follows into the next Chain 2 space
[3 trebles, chain 2, 3 trebles]
And repeat two more times to complete round 2 and join with a slip stitch
Round 3:
2 slip stitches across the tops of the trebles in Round 2 so that you are positioned to start working into the first Chain 2 corner space. I always start a round into a corner.
Make a corner per round 2.
Work a cluster into the next space
Make another corner and continue round in this way, join with a slip stitch
Round 4 and every subsequent round:
Continue as per round 3, lengthening the sides of the square each time by adding a 3 treble cluster into each space.
I realise that a video or more pictures might make this easier to understand! That’s coming at a later date 🙂 along with how to join squares! How did we manage before phone cameras and video tutorials? I guess we had real live aunties and grannies who sat next to us and demonstrated … ah the good old days!
Happy crocheting,
Bridget
Excel template to download:
cowgirlblues Granny square blanket template